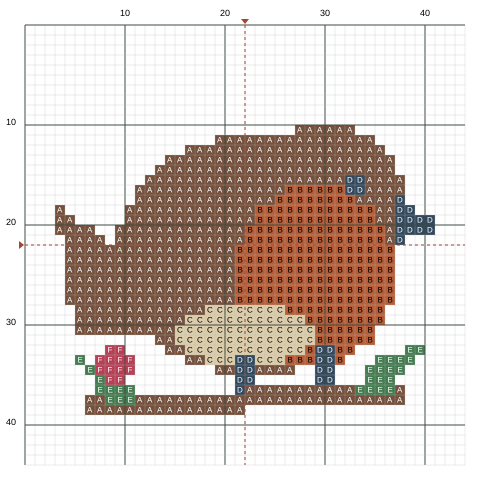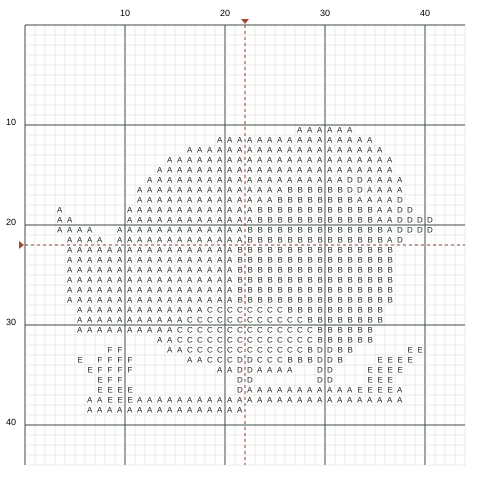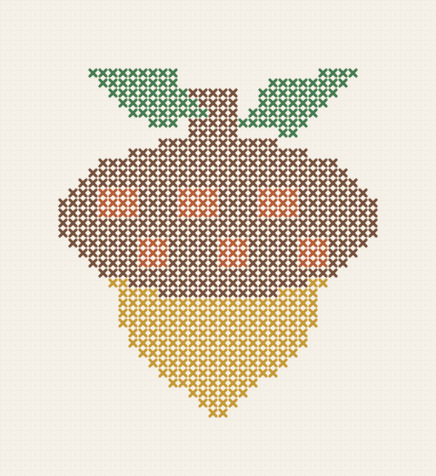
Woodland Acorn Ornament
684 stitches · Full crosses only
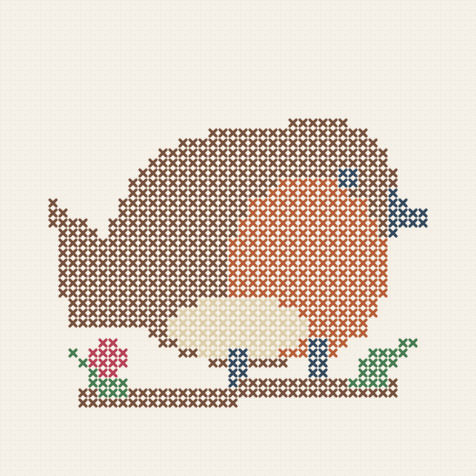
Stitch preview · simulated from the actual chart
A side-facing robin with a warm breast perches on a berry branch.
Design size
3.14 × 3.14 inCut at least 9.25 × 9.25 in of Aida
The project bundle includes the complete symbol chart, DMC thread list, stitch order and illustrated finishing plan. See the finishing steps.
Free, complete PDFs. No account needed. Your choices stay on this device.
Estimate includes 20% extra. Tension and thread travel can change usage.
| Symbol & color | Stitches | Single-strand length | Skein equivalent | Buy if needed |
|---|---|---|---|---|
| A DMC 433 - Medium Brown | 424 | 10.83 m | 0.226 | 1 skein |
| B DMC 3830 - Terra Cotta | 199 | 5.14 m | 0.107 | 1 skein |
| C DMC 712 - Cream | 66 | 1.77 m | 0.037 | 1 skein |
| D DMC 336 - Navy Blue | 31 | 0.84 m | 0.018 | 1 skein |
| E DMC 367 - Dark Pistachio Green | 27 | 0.76 m | 0.016 | 1 skein |
| F DMC 326 - Very Dark Rose | 12 | 0.44 m | 0.009 | 1 skein |
A six-strand 8 m skein supplies 48 m of single strands. Use matching colors from your stash, or buy at least one skein per color. Screen colors are a guide.
Use the listed DMC Article 117 six-strand cotton numbers for this palette. Names and numbers were checked against the manufacturer list; screen swatches are illustrations, not calibrated thread colors. Compare real skeins before stitching. These projects have not been physically sample-stitched.
DMC Article 117 number and name list · 6 selected thread colors; sewing thread is separate.
Also gather a blunt tapestry needle, a hoop and scissors. Estimated stitching time: 4.8–8.4 hours at 90–160 stitches/hour. This estimate has not been timed by a stitcher.
Work the brown body around the center, leaving the breast and belly cells for their own colors.
Continue into the brown head, then count left to the pointed tail; check the tail top separately from the back.
Fill the red-brown breast and narrow ivory belly, following their curved shared edge.
Add the navy beak, small eye and two legs. Count the eye from the head edge before securing its short tail.
Work the branch below the feet, the two green leaves and red berry; restart across any unstitched gap.
Check that the feet meet the branch and the beak stays distinct. Secure tails and use the rectangular ornament finish around the full chart.
This design includes 2 intentional single stitches in details or stepped edges. End and restart the thread when a gap is longer than five squares.
Winter Robin Ornament · 14 count Aida
Fold a stitched front onto felt, secure a ribbon loop inside and sew the edges into a flat decoration.
These are measured-layout plans and original assembly diagrams. Fabric stretch, bulk, tape adhesion and the finished object have not been physically sample-tested. Make a paper dry fit and measure your actual supplies before cutting.
Diagrams are not full-size templates. Use the written dimensions and check any printer scale before tracing.
Keep the full chart and 0.25 in of visible blank cloth on every side. Mark a finished rectangle 3.64 × 3.64 in. Add 0.38 in outside each edge for the fold allowance.
Check: The smaller rectangle is the finished edge; the outer rectangle is the cut line.
After securing tails, cut the Aida to 4.39 × 4.39 in and felt to 3.64 × 3.64 in. Leave the Aida corners intact. The felt uses the finished dimensions, without the Aida fold allowance.
Check: Both pieces are square; the Aida is larger than the felt.
Place the stitched face down. Fold long edges to the back by 0.38 in, then short edges by the same amount. Clip instead of gluing so the folds can be adjusted.
Check: The visible border stays on the front and all raw Aida edges turn inside.
Fold a 6.00 in ribbon in half. Put both ends 0.75 in onto the inner face of the felt at the top centre. Sew through each end and felt several times, keeping the loop untwisted.
Check: Tug gently on the loop before adding the front. Reseat loose stitches; the outer edge seam alone should not hold the ribbon.
Place the folded Aida front over the inner felt face, with the stitched face out. The ribbon ends and raw folds sit between the two layers; only the loop projects above the top. Clip the edges level.
Check: Check both faces and the top centre before stitching the seam.
Hide a knot between the layers. Pass the needle through the felt edge and folded Aida, around the edge and through both again about 3–4 mm ahead. Sew all four edges without stuffing. Add extra passes at the ribbon ends and bury the tail inside.
Check: Thread holds the layers together without curling the edge. Any open corner gets another small stitch.
Gently test the loop and examine every seam on both sides. Ease and resew any puckered area. Hang indoors from a secure hook, away from heat and moisture. The ribbon loop is for a light decoration, not a load-bearing strap.
Check: Front and back lie flat, anchors remain covered and the loop cannot pull out.
The sizing rules and diagrams above are original to this planner. These sources describe the underlying finishing techniques.