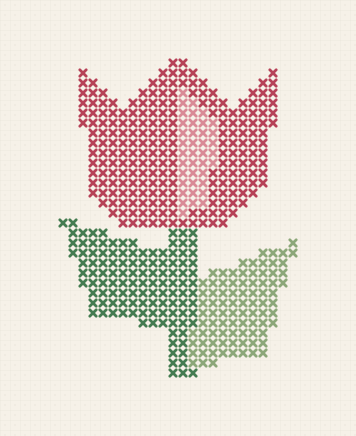
Pocket Tulip
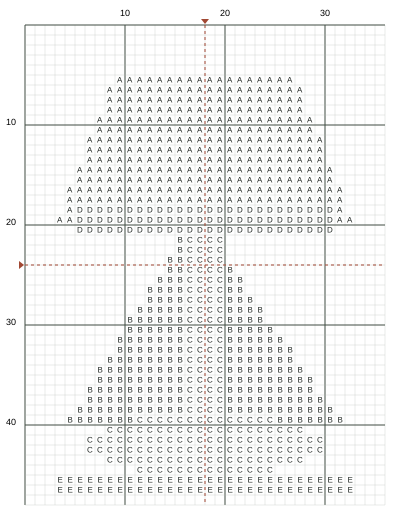
458 stitches · Full crosses only
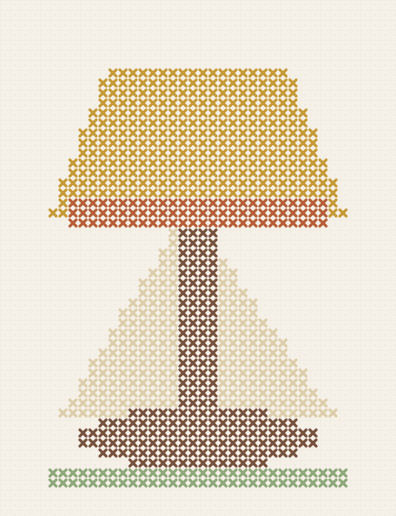
Stitch preview · simulated from the actual chart
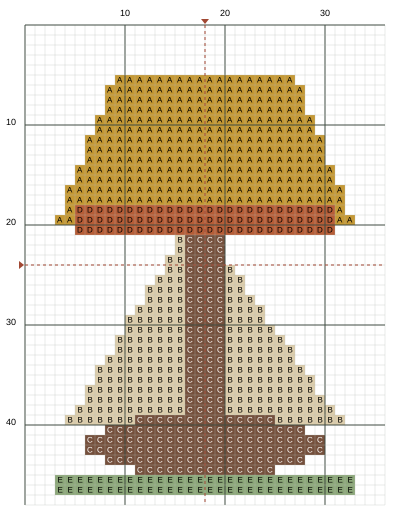
A broad lampshade casts a warm triangular pool of light.
Design size
2.57 × 3.43 inCut at least 9.25 × 10.00 in of Aida
The project bundle includes the complete symbol chart, DMC thread list, stitch order and illustrated finishing plan. See the finishing steps.
Free, complete PDFs. No account needed. Your choices stay on this device.
Estimate includes 20% extra. Tension and thread travel can change usage.
| Symbol & color | Stitches | Single-strand length | Skein equivalent | Buy if needed |
|---|---|---|---|---|
| A DMC 729 - Medium Old Gold | 308 | 7.82 m | 0.163 | 1 skein |
| B DMC 712 - Cream | 207 | 5.31 m | 0.111 | 1 skein |
| C DMC 433 - Medium Brown | 188 | 4.91 m | 0.102 | 1 skein |
| D DMC 3830 - Terra Cotta | 78 | 2.02 m | 0.042 | 1 skein |
| E DMC 368 - Light Pistachio Green | 60 | 1.65 m | 0.034 | 1 skein |
A six-strand 8 m skein supplies 48 m of single strands. Use matching colors from your stash, or buy at least one skein per color. Screen colors are a guide.
Use the listed DMC Article 117 six-strand cotton numbers for this palette. Names and numbers were checked against the manufacturer list; screen swatches are illustrations, not calibrated thread colors. Compare real skeins before stitching. These projects have not been physically sample-stitched.
DMC Article 117 number and name list · 5 selected thread colors; sewing thread is separate.
Also gather a blunt tapestry needle, a hoop and scissors. Estimated stitching time: 5.3–9.3 hours at 90–160 stitches/hour. This estimate has not been timed by a stitcher.
Start with the brown lamp stand and oval base.
Fill the visible ivory triangular light area behind the stand.
Work the gold shade with its sloping side edges.
Add the red-brown band along the lower shade edge.
Count down to the pale green line below the base.
Check shade symmetry and the stand center, then secure tails before framing.
Cozy Lamp · 14 count Aida
Check the chart corners against the hoop opening, allow cloth for the rim and gather the back before adding felt.
These are measured-layout plans and original assembly diagrams. Fabric stretch, bulk, tape adhesion and the finished object have not been physically sample-tested. Make a paper dry fit and measure your actual supplies before cutting.
Diagrams are not full-size templates. Use the written dimensions and check any printer scale before tracing.
Measure the inside of the inner ring across its centre. This chart needs at least 4.79 in: its whole-chart diagonal plus 0.25 in at both ends. Make a paper chart rectangle and centre it in the opening.
Check: All four corners have the planned clearance. A width-only test misses the corners.
Measure the assembled outside diameter (5.50 in here), inner-ring outside diameter (5.25 in), and rim depth (0.38 in). Beyond the outer hoop allow depth plus 1.25 in to gather: a total trim diameter of 8.75 in.
Check: The full circle fits inside the working cloth. If it does not, keep the cloth uncut and choose larger cloth or another finish.
Put the inner ring below the fabric and the outer ring above it, screw at the top. Align the chart centre with the opening centre. Tighten gradually, keeping the fabric grain straight; recheck the front after every adjustment.
Check: The front is smooth, the chart is square and the border is even. Do this before cutting.
With fit and centring confirmed, mark a circle 8.75 in across, centred on the hoop. Check the mark lies on cloth all the way around before cutting. Keep the entire 1.63 in beyond the outside rim.
Check: A strip of missing cloth cannot be replaced by pulling harder. Stop if any part of the circle falls off the fabric.
Turn the hoop over. Run a strong thread around the fabric edge about 6 mm in from the cut, with small running stitches. Pull evenly so the cloth folds over the rim and gathers inward. Check the front again, then knot the gathering thread securely.
Check: The gathered cloth sits inside the back. It does not pull the chart off centre.
Trace the outside of the actual inner ring on felt; the entered diameter is 5.25 in. Cut a paper test circle first, then felt. Lay it over the gathered back so the raw edges and gathering thread are covered.
Check: Adjust the felt to the hardware; do not cut away the Aida gathering allowance to make the felt fit.
Work a small whip stitch around the felt edge, catching the gathered cloth behind it. Keep the needle in the back layers so it does not pierce the displayed front. Use relaxed tension and bury the final knot and tail beneath the felt.
Check: The felt is secure all around and the front has no new needle marks or puckers.
Inspect the centred front and covered back. Retighten the hoop only if it is loose. Use the hoop screw bracket or a securely tied ribbon as the hanger; check the chosen wall hook supports the hoop. Keep the work indoors and dry.
Check: The hoop remains secure under a gentle lift and the fabric has not slipped.
The sizing rules and diagrams above are original to this planner. These sources describe the underlying finishing techniques.